The Mapping Tool’s Database Toolset
Reading Metadata
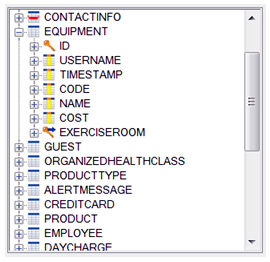 Once you connect to a database in the Mapping Tool you can import existing tables into the tool.
The tool reads the table definition and the datatypes of the columns. It identifies the primary key(s) and defined foreign key constraints.
You can see more details about the columns and foreign key constraints but we’ll discuss these interfaces later when we are going to define our own table definitions.
View database data
You can view “live” data from your connected database. Simply popup the menu from the database table and select one of the options “View 10 rows” or “View all rows”.
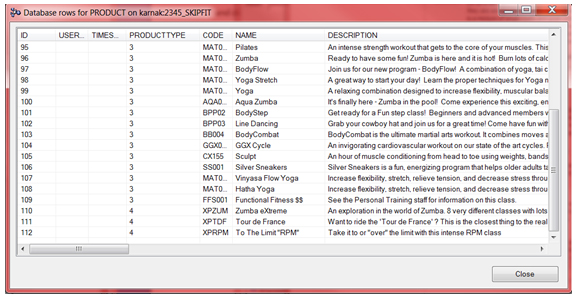
With this feature you can explore the data in your database and figure out how tables are related to each other.
View “live” objects
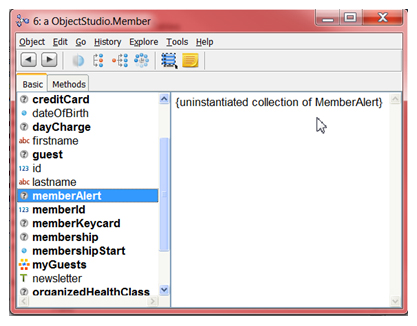
If you have defined mappings in your mapping tool then you can actually inspect these objects with data from your database. Popup the menu from a class and select the “Inspect” option.
Using a “Trippy” inspector you can explore your object and even relationships can be inspected when they are mapped. Relationships in the inspector are mostly still proxies. When you’re inspecting a proxy simply inspect its value and the proxy will realize itself and you’ll get the actual object.
Migrate your database schema
Once you have a Glorp DescriptorSystem generated from the Mapping Tool, then you can migrate this database schema to another database (different server and/or different vendor).
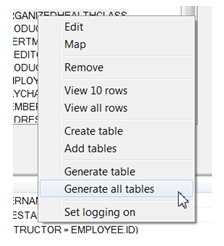 When you open the DescriptorSystem you are asked to connect to a database. Instead of using your normal database simply connect to your new database where the tables are not yet defined. Of course you won’t be able to view data on this database but when you popup the tables menu you have an option to “Generate table” or to “Generate all tables”.
Choose the “Generate all tables” option and all tables will be created on your database system. Not only the tables will be created on the database but also the primary key definitions, foreign key constraints when defined and sequences if needed.
One thing you have to be careful about is reserved words. These are different from vendor to vendor and some definitions might not be valid on certain databases.
Define your own tables
With the Mapping Tool you can define and create your own tables as well. You can create these tables from scratch or from a defined class model. To start from scratch choose the “Create table” option from the tables popup menu. To start from an existing class simply select the class and choose the “Create table” option. The table definition screen exists of 3 parts:
Field definition
In the “scratch” version the contents of this first part is empty.
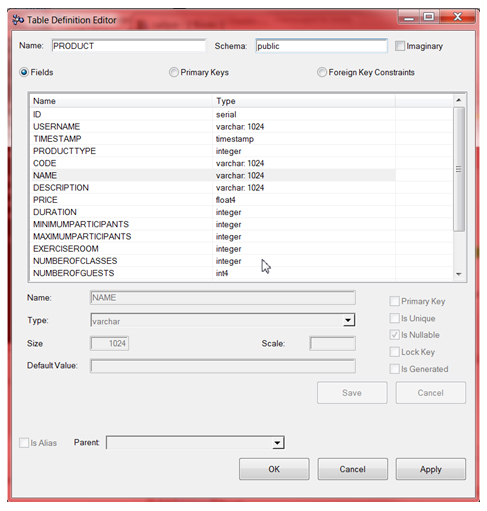
When you start from a class model however this is fully filled with names derived from the class and its attributes. The database datatypes are derived from the attribute types defined in the model. Changes however are sometimes necessary.
Serial fields and character fields in particular might need some editing since the class model has no serial type or size notion for string fields.
Be careful with reserved words. The tool does not check for these and you might have errors when you try to generate the tables on the database.
Primary keys
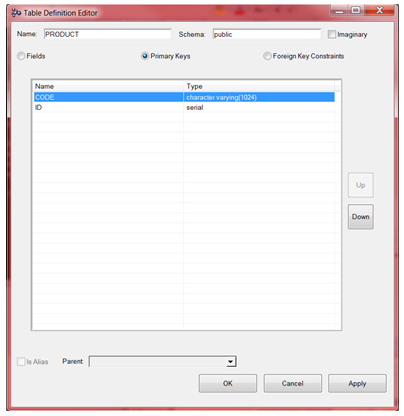 You define your primary keys in the field definition part and in this view you have an overview of these fields.
If there is more than one primary key column then you can change the order of these fields.
Foreign key constraints
The last part of the database creation is the foreign key constraint definition.
The name of the foreign key is generated based on the fields defined in the constraint.
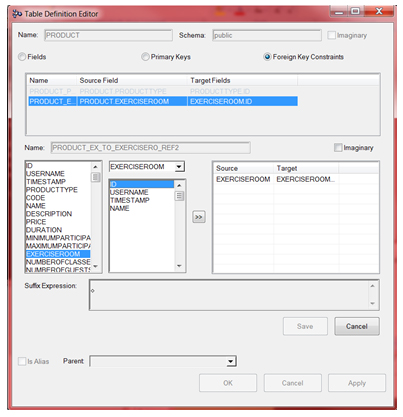
You select a field in the source table and the matching field in the chosen target table. Then you press the “>>” button. If the foreign key consists of multiple fields you repeat this with a new set of fields.
Note that once you created your table the table only exists in the Mapping Tool and not yet in your database. To generate the table in the database you need to use the functionality discussed earlier in the article.